The past decade has been witness to an explosion in research and development for computer vision. From Alexnet’s modest roots, leveraging gaming GPUs to bump convnet performance on the ImageNet challenge, neural net-based computer vision methods now underly powerful economic engines, and a huge research community has released a host of open source tools for solving computer vision problems for fun, art, and profit. The ability to algorithmically understand image content offers new capabilities for interactive computational experiences, and as megacorp labs pour billions of dollars into ever-growing concentrations of data and compute, onlookers breathlessly foretell a technological singularity powered by Artificial General Intelligence.
In the face of such power and progress, one might then reasonably ask – cool, but can I actually use computer vision for anything?
From 0 to 1
By “use” I mean, how can we take the methods and tools available in the broader machine learning (ML) community, and deploy them on our own hardware to solve a problem in the real world? Beyond gated, nonfree cloud offerings focused on narrow domains, how do we create practical solutions that we own and control? Solutions that work for whatever unique hardware, data, and environments we might have, for tasks beyond face recognition, or autonomous vehicle street understanding, or detecting Pepsi logos on a TV screen.
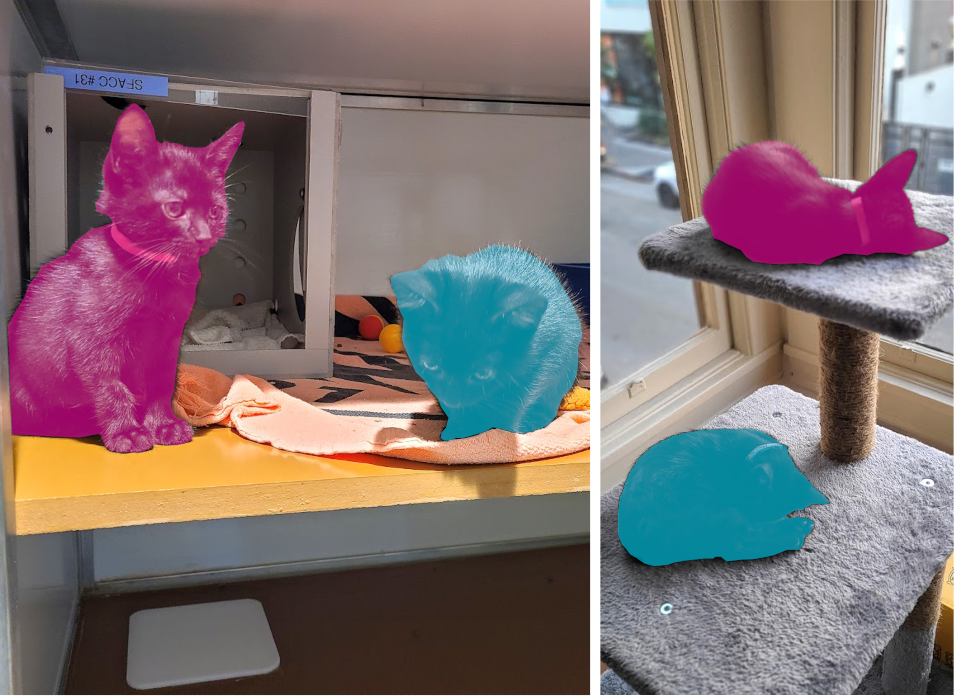
This blog series will provide a step-by-step guide to answering this question in its entirety, starting from scratch and ending with an app running on Arduino hardware. The focus will be on how to practically use computer vision to create a real-time Arduino video segmentation app. To keep the project tangible, I will explore creating a segmentation app to detect my two new kitties, Peach and Daisy:

Segmentation involves automatically creating pixel masks of objects of interest, like so:
Project Setup
This post will cover initial setup of the hardware I will be using throughout the series, as well as the OpenMV IDE for working on embedded machine vision applications.
Hardware
This project uses the Arduino Portenta H7 along with the Vision Shield camera and computer vision module, which I purchased together as the Arduino Machine Vision Bundle. The Vision Shield has a low-power 324x324 grayscale camera that’s well-suited for the limitations we will face trying to do embedded ML.
I make no claims to whether or not this will work with other Arduino hardware, but the OpenMV IDE claims compatibility with a broad host of camera modules, and this project may transfer in whole or part to other OpenMV-compatible hardware.
Development Environment
For this project, I will be working between my desktop computer running 64-bit Ubuntu 18.04 and a laptop running 64-bit Ubuntu 20.04. Hardware and OpenMV setup was the same on both, but only my desktop has a GPU (NVIDIA GTX 1080) that will get used in later stages of this project. For this post, it’s irrelevant.
My initial testing of the hardware followed the official guide. In particular, this section at the end was crucial for both of my computers:
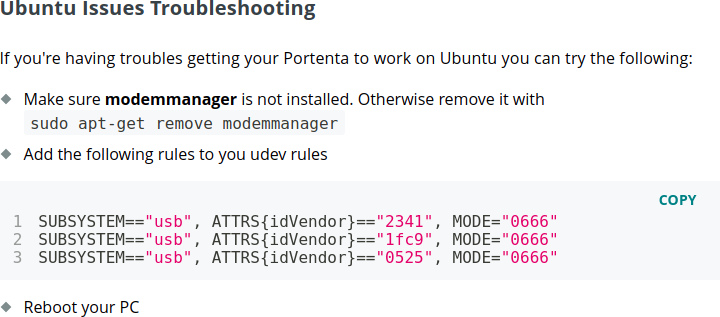
To add the new udev rules, I created a file with sudo touch /etc/udev/rules.d/99-arduino.portenta.rules and added the three suggested lines of text into it.
As suggested in the official guide, I first tried running basic scripts using Arduino IDE 2.0. I was able to get the Arduino “hello world” blinking LED script to work, but nothing involving the camera. In my search for a solution, I learned about the OpenMV IDE as a micropython-based alternative to the Arduino IDE. With OpenMV, everything basically Just Worked, so this post will focus on that.
OpenMV
Compared to Arduino IDE, getting my hardware working in OpenMV was a breeze. I downloaded the Ubuntu runfile here, and to get the default OpenMV “hello world” script reporting a camera image back to the IDE, I followed a few steps most easily conveyed as an image series:
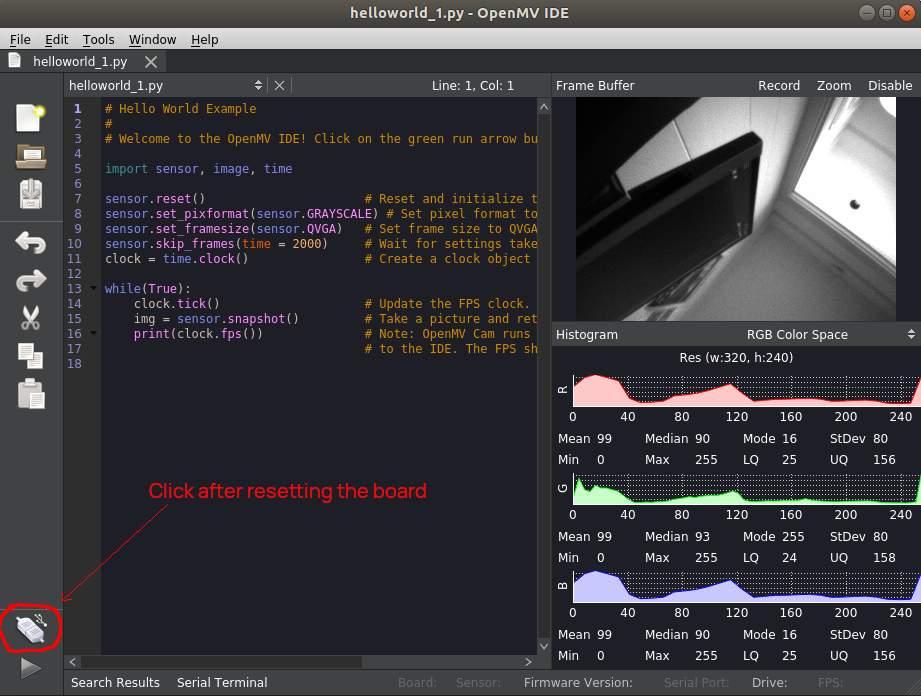
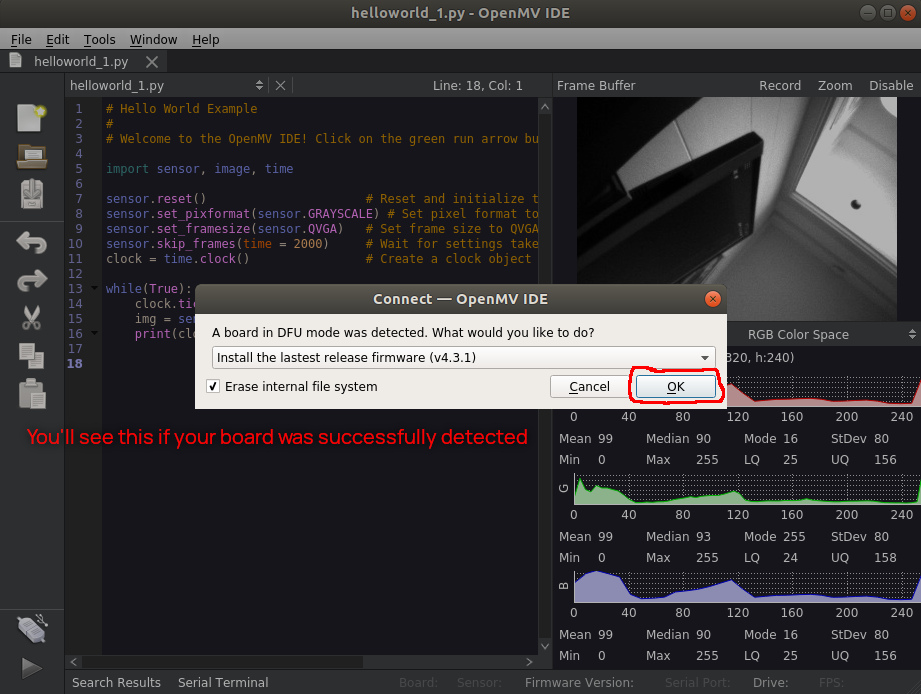
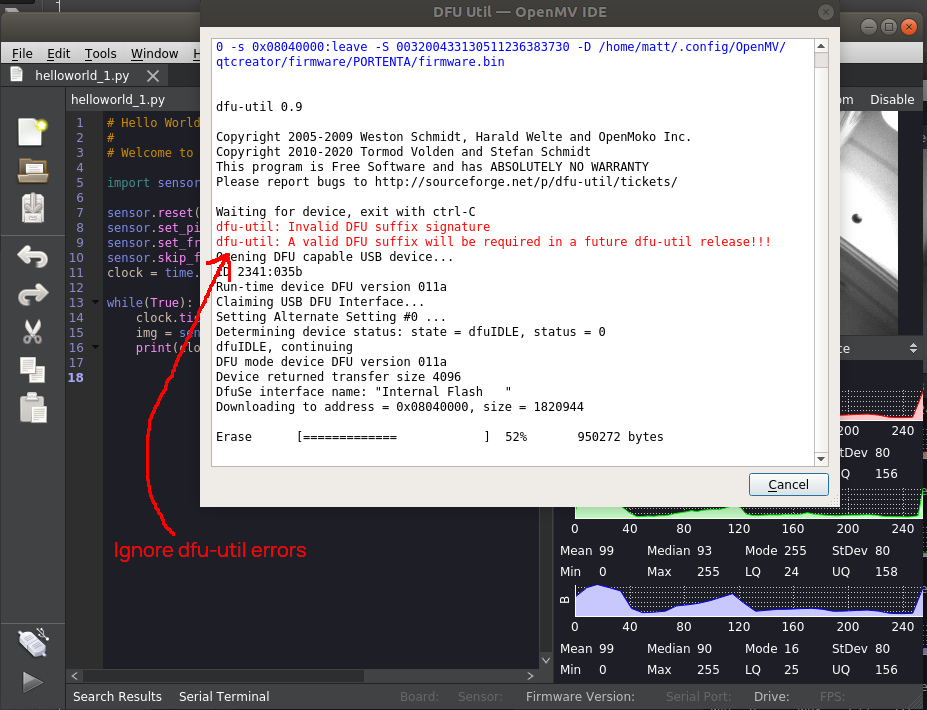
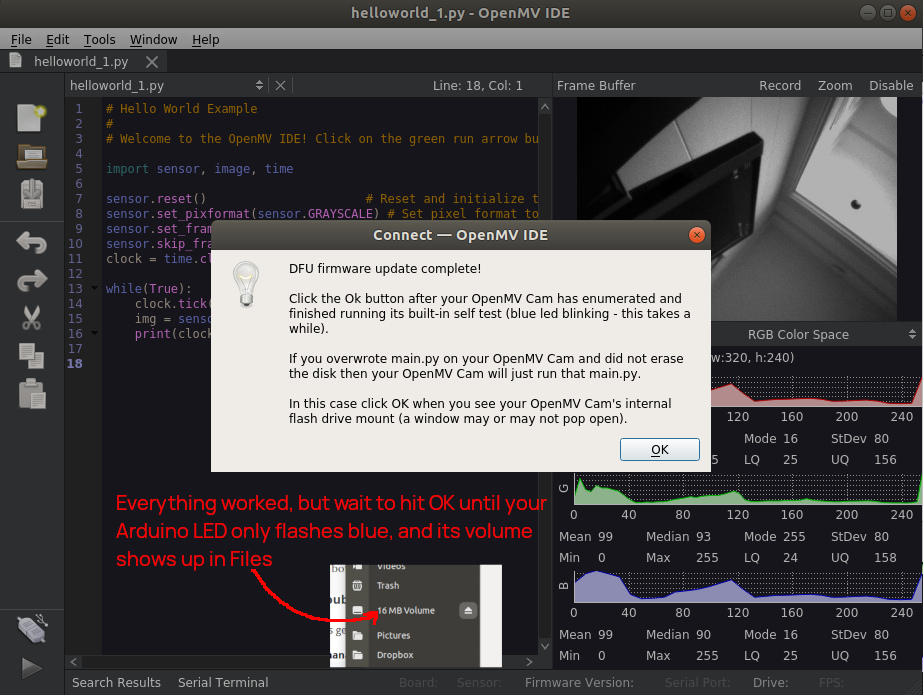
If all has gone well up to this point, the script should work! You’ll see a video feed, and live updates from the color channel histogram displays.
Recording Video
You can also easily record the video stream, a capability that will be useful when we start gathering training data in the next post in this series:
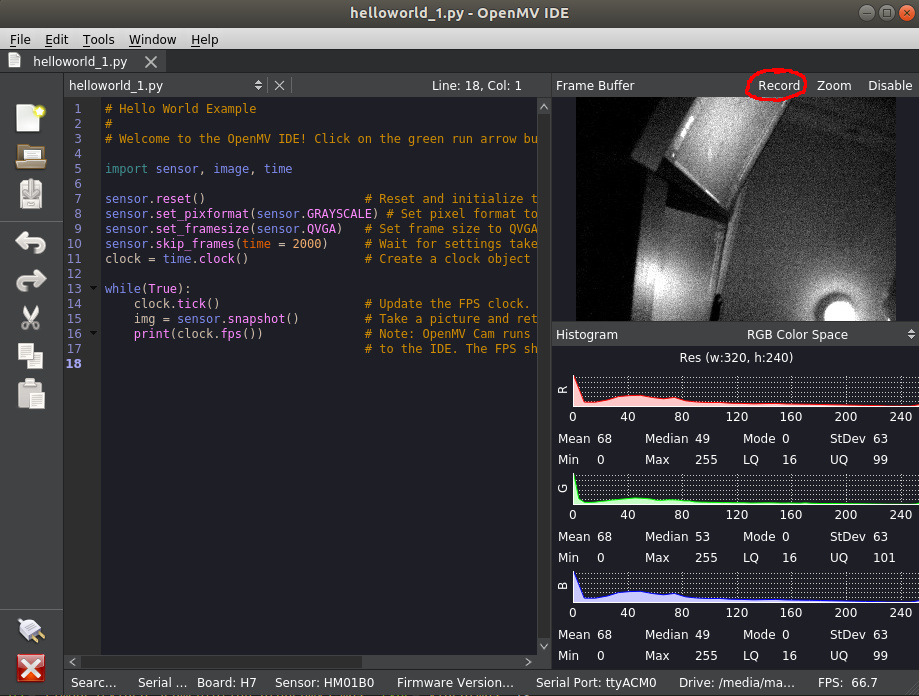
Here’s an example of what that recorded video looks like in my dim office:
Wrapping up
If everything has worked up to this point, you have a working OpenMV camera and you’re set up to continue. Try out some of the other example OpenMV sketches (File > Examples). In the next post, we’ll look at creating training data for a segmentation algorithm from our camera video streams.